Wednesday, June 20, 2012
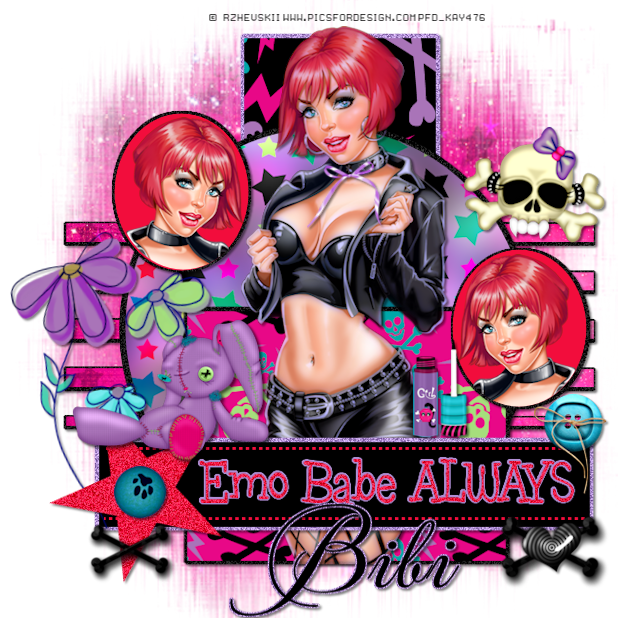
Emo Babe Always-PTU
This tutorial was written for those with working knowledge of PSP
Supplies needed:
PSPX2 any version will work
Tube of choice :
I used Eugene Rzhevskii you can purchase from:
PSPX2 any version will work
Tube of choice :
I used Eugene Rzhevskii you can purchase from:
PicsForDesign HERE
Scrapkit:
Emo Meow PTU you can purchase from:
PicsForDesign HERE
Template:
#193 Denz Designsz HERE
Mask of choice:
Mask of choice:
Font of choice:
Let's get started:
1
Open the template in psp delete credit
2
Click on strips selection select all float defloat from the kit copy and paste a paper of choice
selection modify expand by2 add a new raster layer flood fill wiyh color of choice
select none move under the paper layer delete the original
3
Do the same to these layers as you did in #2 above:
pink shape2
black oval
pink shape1
black strip
emo babe w/a
dotted lines
4
Click on small circle2 selection select all float defloat add a new raster layer flood fill
with color of choice selection modify expand by2 add another raster layer
flood fill with color of choice move this paper under first color
click on the first color copy and paste your tube of choice
resize position inside circle select none
5
Do the same to circle1 as you did in #4 above
6
Add your tube of choice again position in middle of tag resize if needed
7
Click on star selection select all float defloat add another layer flood fill with color of choice
add a noise of choices elect none delete the original
8
From the kit copy and paste any elements of choice resize if needed
see my tag as reference
9
Add drop shadow of choice to elements
10
Add your name and copyright
11
Clicl on the bottom layer add a paper of choice than add
your mask of choice merge group
12
Clicl on the bottom layer add a paper of choice than add
your mask of choice merge group
12
Save as a png
ALL DONE
ALL DONE